Love winter and its scents? Let’s bring illuminating winter night into your shower with gorgeous and sparkling DIY shower melts!
Have a look at how to make shower steamers with Epsom salt; they make a lovely seasonal gift for anyone. They’re budget-friendly, easy to make and pamper you with uplifting and warm scents of aromatherapy.
Let’s go make shower bombs!
Today we’re continuing with the Christmas series of this year. I’m happy to present to you Arctic Illuminating shower steamers! These babies are easy to make and make a lovely gift. You can easily combine it with this Illuminating Whipped Body Butter I published recently; the two will make a lovely combo!
These steamers came to be a result of Christmas ideas and my obsession with them in the recent months. They’re especially great for all who love winter, as the scent is a blend of essential oils that reminds me of cold winter evening: it’s warm but spicy, yet gentle and crisp.
We’re adding some mica to give the fizzies a lovely sparkle as well. The recipe is easy enough for any level of DIY, so even if you’re a complete beginner, don’t worry!
I love these cuties because they are
Easy to make
Completely natural
No prior experience needed
Smell amazing
Budget-friendly
Make lovely gifts for anyone
Are you ready? Let’s get steaming!
How do you make a homemade shower steamer?
I already have a few other steamer recipes on the blog. You can find the woodsy steamers here, and the cardamom steamers without citric acid here.
But essentially, making these fizzies only requires a few simple steps.
In this recipe, I’ve used both citric acid and baking soda that I mixed together before adding other ingredients.
Next, I added tapioca starch and Epsom salt. You can replace tapioca with corn starch.
Mica coloring is optional, but it adds the sparkling undertone to this illuminating series. You can omit it though or substitute it with another mica of your choice. In any case, you don’t have to worry about mica staining the shower floor; I’ve tried many different options of colors and I’ve never had any stains left.
Now, concerning Epsom salt; I included it into the recipe because some of you requested a recipe with it. I have to say that Epsom salt won’t do much in terms of its benefits and your skin here since we’re draining it down the shower tub. You can omit it if you want, or replace it with sea salt instead.
No matter what salt you use, make sure to grind it slightly to get smaller particles. I used a mortar and it did the job well.
Epsom salt is great in bath bombs and bath salts due to its many benefits, such as:
- Soothes the skin
- Minimizes soreness and pain
- Promotes skin health
- Relaxes muscles
- Detoxifies the skin
There are many other benefits, but we won’t get any of these with shower melts. I’d recommend you add it to other DIY recipes where you can actually benefit from it more.
Also, you can’t use the shower melts as bath bombs because the essential oil concentrations are too high in these fizzies and not appropriate for skin use.
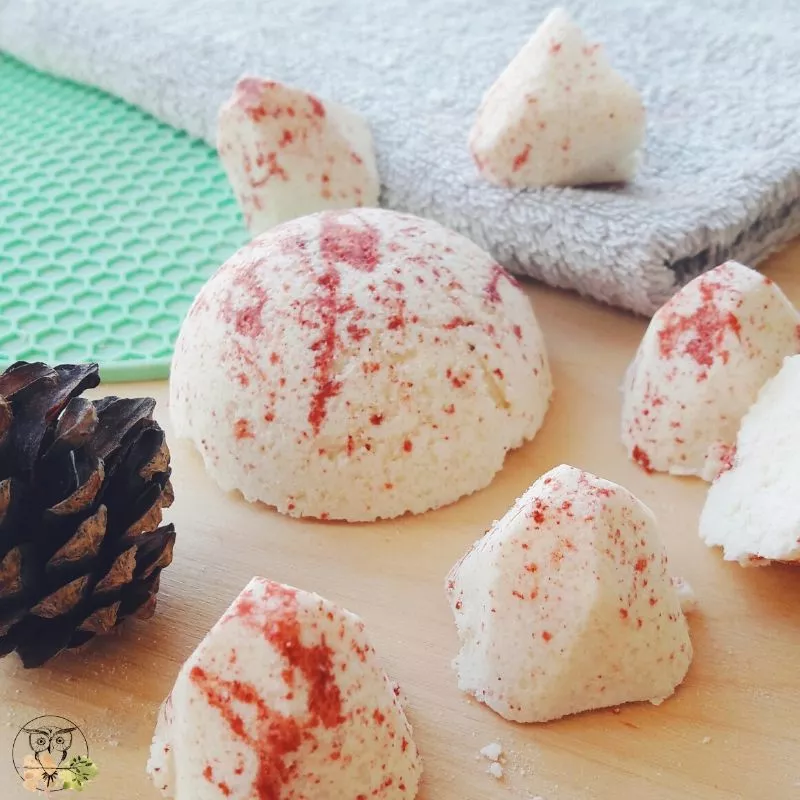
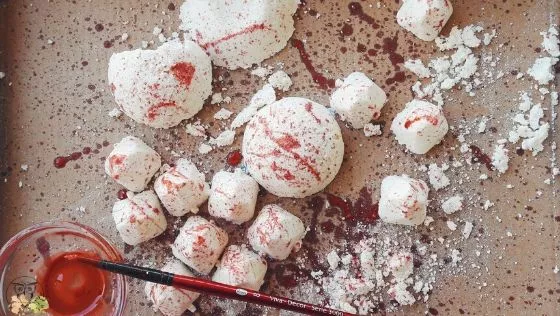
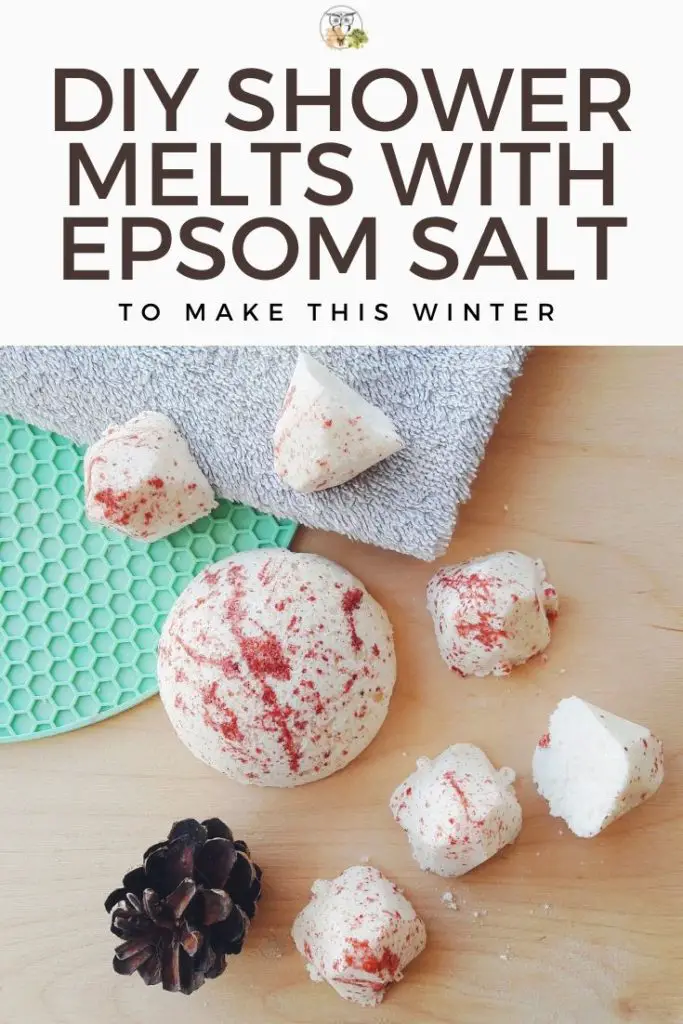
Optionally, you can additionally add a splash of color to these steamers to make them more seasonal; I splashed them with a mix of bronze mica and red titanium oxide. I think they fit well into the seasonal mood, don’t you? (and yes, I made a bit of mess!)
Arctic DIY Shower Melts With Epsom Salt
Ingredients:
- 140g baking soda
- 70g citric acid
- 70g tapioca starch
- 20g Epsom salt
- 15g water
- 2 TSP white pearl mica powder
- 1.5g orange essential oil
- 0.7g cardamom essential oil
- 0.3g clove essential oil
For the splash of color:
- 1g of olive oil (or any other cheap option you have on hand)
- a dash of red titanium oxide
- a dash of bronze mica
Process:
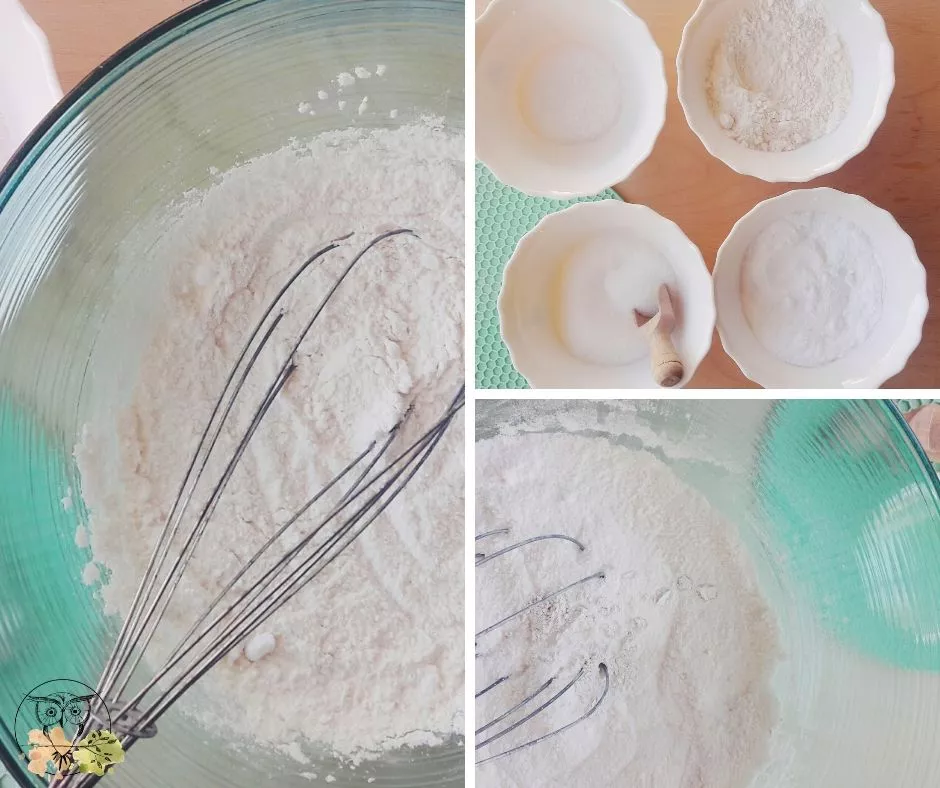
- Weigh all the ingredients
- Combine citric acid with baking soda
- Add tapioca flour and stir the mixture well (with a whisk)
- Add mica powder and stir well
- Slightly grind Epsom salt and add into the mix. Stir again
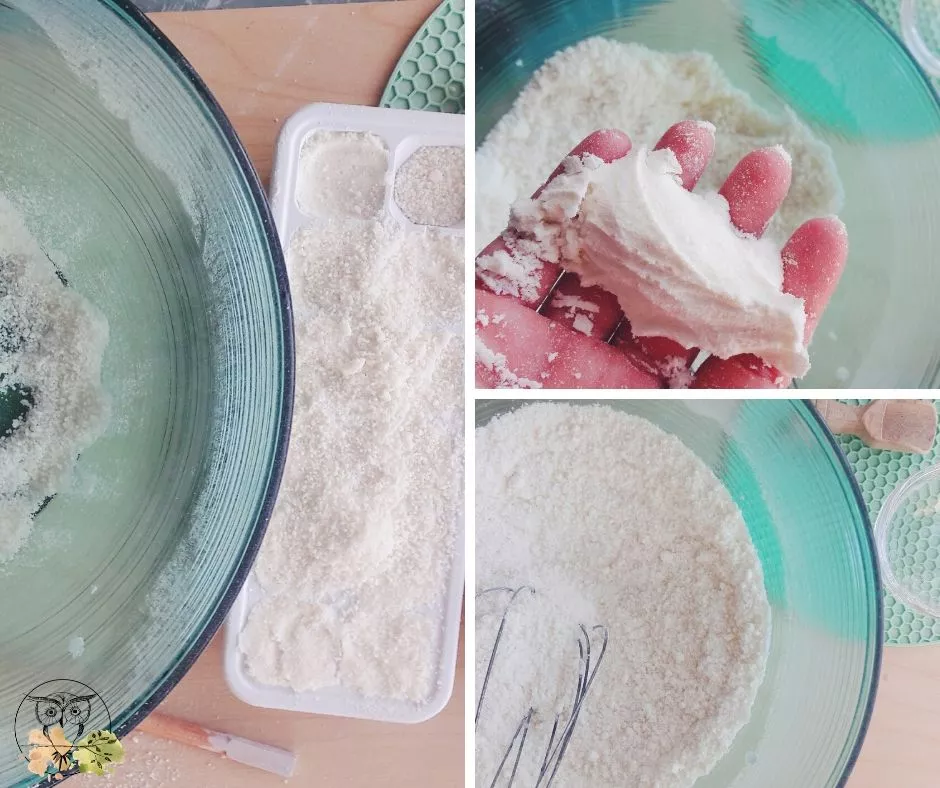
- Combine water with essential oils
- Take your whisk and slowly pour water into the mixture bit by bit (a few drops at a time)
- Whisk the mixture vigorously to evenly distribute water
- Once you get a paste that stays in a lump when you squeeze it, your mix is ready
- Fill the molds with the paste and make sure to pack them well
- Let the steamers sit in the mold up to 1 hour to dry
- Then, take them from the molds and let them air dry for another hour or so
- Store them in an airtight container
- For extra color: mix olive oil with red oxide and mica powder well. Then, take a brush, dip it into the color and start splashing it over the melts
- To use: take one steamer and place it on the shower floor away from the direct water stream. Sprinkle it with water and let it fizz away!
- You can omit citric acid in the recipe, but in my experience, the steamers fizz more and give away more scent than without it. If you decide to omit it, you’ll have to adjust the water ratio
Notes:
- Whisk the powder mixture slowly or you’ll end up with a starch mixture in your nose. Not great!
- Keep the steamers in a clean dry jar, stored away from humidity or water
- If you believe the essential oils are not strong enough, add a drop or two on the steamer just before you use it
- If you use too much water, the melts will turn into puffs of baking soda. They won’t fizz and they’re pretty useless in my experience
- I’ve provided the exact amount of ingredients to make the steamers come together nicely
- The large steamers weigh about 55g each
- The small steamers weigh about 9.50 each (one-time use)
- Those steamers that I don’t use in one go, I set out to dry completely after a shower and store them in an airtight container. When I want to use them, I add a few extra drops of EOs on them to boost the scent
- You can substitute pearl mica with another mica of your choice
- You can add a few drops of peppermint oil into the mix to make the steamers crispier to the scent.
- Use a different mica to add the splash of color or omit it altogether
Have you made this recipe? Tag me on Instagram: #wildfordiy
Stay Wild,
Kat
Help support Wild for Nature
Many of you have asked if there’s a way to help support Wild for Nature. I’ve signed up for Buy Me Coffee. If you love what I do, learn from me, sell anything you made from my recipes, and want to see Wild for Nature grow even more, I’d be thrilled if you’d consider buying me a coffee! It works as a one-time or a monthly donation of $3. You can also get beautifully designed PDFs with a series of recipes and other resources I publish there, to help you learn and get creative at home! I can then use that money to further develop and grow Wild for Nature and you can help me continue with wild creations and resources!