Hello there, and thank you for your support!
In this article, you’ll find all you need to know about the series before you get started with the recipes. I’ll tell you a bit about how this series came to be and you can find a complete list of ingredients (gathered in one place for the most convenience) you need along with a link to the already prepared shopping list below.
You’ll also learn a thing or two about the ingredients we’re using so that you understand them better and can use them in your own recipes at home.
If you have any question or comments, feel free to leave them below, so that we have all the queries gathered in one place, making the whole process more convenient and practical!
Now, without any further ado, let’s get started!
About the series
Arctic Illuminating Series was designed as a part of DIY Christmas gift recipes. The idea for the series came to me one cold November morning when I received a DIY package with a new round of ingredients that also included cupuacu butter.
I’ve never worked with cupuacu butter before but I was eager to try it, so that’s how this series of recipes came to be. Relatively new to my stock was also hazelnut oil and I’m excited to report that I’ve grown to love both of these new acquisitions.
Since it was winter back then, I was trying to make something that would be nourishing and creamy, powerful enough to support dry skin during the harsher weather conditions but at the same time wouldn’t be too greasy. I figured that a combo of soft yet less greasy butters and quick-to-absorb-carrier oils would make a perfect combination for what I was trying to achieve. I can say, with a huge smile on my face, that the mission succeeded. All the products in the series (apart from the shower melts) are creamy, nourishing, gentle to the skin, and get absorbed quickly enough.
Last but not least, I was brainstorming with the scent for a long time. I got my hands on an essential oil blend that had just the perfect scent for what I was looking for. The blend was more complicated than mine, so I decided to make it less complicated and use only 3 essential oils that do the job of mimicking warm but crisp and spicy winter night just perfectly!
To top it all off, white pearl mica gives the products a lovely shimmery glow, just like freshly fallen snow on an early winter morning, sparkling in the light of the sun. You can use a different mica powder (blue would also work well!) or even omit it altogether, whatever you prefer.
Poetry aside, let’s go over the recipes you’ll be making and the complete list of ingredients!
Recipes you’ll make
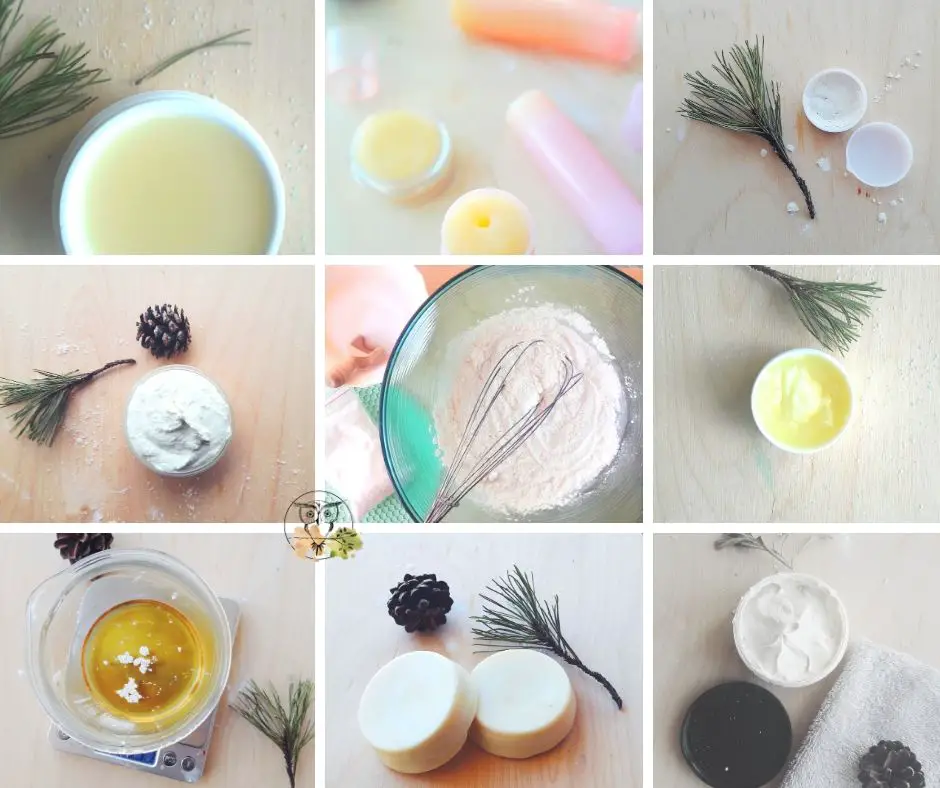
Here are 8 different recipes that you’ll make in this series. I’ve also added the approximate grams of how much each recipe will make so you can have an idea of what to expect before you get whipping. Keep in mind that these amounts are approximate (as I’m a messy DIYer and didn’t exactly follow through with every product I made)
- Whipped body butter (200g)
- Whipped body scrub (200g)
- Creamy lip balm (25g)
- DIY Luminizer (5g)
- Body butter bar (80g)
- Shower melts with Epsom salt
BONUS: two additional recipes that I didn’t publish on the blog:
- Creamy facial cleansing balm (45g)
- Healing Spiced Foot Butter (45g)
Ingredients we’ll use
You can find a Complete Shopping List for this series here!
Here’s the complete list of ingredients you’ll need to make the recipes, but have a look at the tips on substitutions below; you don’t have to get everything from the list!
- Mango butter
- Cupuacu butter
- Macadamia nut oil
- Hazelnut oil
- Candelilla wax
- Cetyl alcohol
- White pearl mica powder
- Vitamin E oil
- Clove essential oil
- Cinnamon essential oil
- Orange essential oil
- Fine sea salt
- Epsom salt
- Baking soda
- Citric acid
- Tapioca starch
- White kaolin clay
- Emulsifying wax NF
In Short: Ingredients with benefits
Mango butter: regenerates the skin, making it smoother and firmer
Mango butter is thick, creamy, and less greasy than shea butter. It leaves the skin amazingly soft and it absorbs faster than shea as well. It’s emollient, it improves skin’s elasticity, and promotes its suppleness. With regular use, you’ll notice your skin becoming softer and firmer.
Mango butter is rich in essential fatty acids (oleic, stearic, palmitic and linoleic). It helps to minimize the signs of aging on the skin and it protects it from environmental damage. It is said that it can also minimize the appearance of dark spots. It has antioxidant, anti-inflammatory properties and it is excellent for dry skin, dermatitis, and eczema.
It’s an incredibly versatile butter and it’s easy to use it since it’s not fussy! It works well in all sorts of skincare, from balms to butters, lotions and creams, lotion bars, hair products, lip balms, products for sensitive skin, and much more.
Cucupacu butter: rejuvenating, emollient, healing properties
Cupuacu butter is similar to mango butter in texture. It’s similarly lightweight and also absorbs into the skin fast. But it comes with a slightly different benefit and component profile. Cupuacu butter is native to Brazil.
When applied topically, it helps to improve skin’s elasticity and suppleness. It prevents dryness of the skin and promotes its regeneration since it’s rich in phytosterols (reduce Transepidermal Water Loss, repair damaged skin barrier and maintain the skin hydrated, moisturized and properly conditioned) and polyphenols (antioxidants that protect the skin from free radical damage, rejuvenate the skin, and minimize the signs of aging).
Cupuacu butter is incredibly versatile; since it has a high capacity to absorb water, it’s emollient properties make it an excellent addition to butters, creams, lotions, hair products, and foundations. That also makes it a great vegetable alternative to lanolin.
Macadamia nut oil: lightweight, emollient, improves skin’s appearance
This nut oil is a pretty close match to the sebum of our skin. It’s a lighter oil and quite quick to absorb; it’s rich in oleic acid and it also contains phytosterols. It’ native to Australia.
Macadamia oil improves skin regeneration and it’s great for dry skin since it can soften it and help it maintain the moisture. It’s emollient and anti-oxidant and it helps to promote suppleness of the skin, improve its appearance and complexion. It can also minimize the signs of aging and it’s suitable for sensitive skin as well.
Macadamia oil is a stable and versatile carrier oil that works well in all sorts of homemade recipes: lotions, facial oils, butters, cleansers, lip balms, and a number of others.
Hazelnut oil: astringent, light, non-comedogenic
Hazelnut oil is a lightweight (even lighter than macadamia) oil that’s rich in a number of vitamins, minerals, and fatty acids. It helps to soften the skin, and it’s suitable especially for dry and irritated skin.
What’s more, it helps to tighten and tone the skin, improve cell regeneration, and boost collagen production, which results in a youthful appearance and glowing skin. It also has astringent properties and it’s one of the oils popularly used in the oil cleansing method for oily skin.
Hazelnut oil doesn’t have a shelf-life as long as macadamia nut oil but that doesn’t mean you should use it in your skincare products. It’s versatile and effective for any type of recipe since it’s affordable. I prefer to use it in facial products because of its properties and nutrient profile, but you can experiment and see how hazelnut oil works best for you!
Cetyl alcohol: fatty alcohol that softens the skin and thickens the products
Cetyl alcohol is not that type of alcohol that dries out the skin. It’s actually a skin-friendly ingredient that helps to condition, hydrate, and soften the skin instead. This is fat-derived alcohol, normally from coconut oil or palm oil.
We add it to products because it helps to bind the ingredients in a recipe together. In lotions and creams, it gives them a more compact and uniform texture. It also works as an emollient and a thickener (you’ll notice its effects especially in the cleansing balm recipe). It helps to keep a product stable and improves slip and viscosity.
What’s more, it helps to make the oil-based products softer and less greasy. I don’t recommend omitting this ingredient from the recipes!
You can use cetyl alcohol in all types of DIY skincare recipes; a little goes a long way and one package will last a long time. I use it in cleansing balms (where I don’t want any thick waxy feel of candelilla wax), all emulsified products (lotions, creams), lip balms, and many other products!
Pearl white mica powder: shimmery addition
Mica powder has a purely decorative purpose in the recipe series. It’s a powder that’ll make the product shimmer; used in small amounts it’ll only give a hint of color to the final product. when used in larger amounts, it’ll “stain” the skin, giving it a (subtle) illuminating glow.
White pearl mica isn’t crucial to the recipes; feel free to swap it for a mica of a different color or omit it altogether.
Epsom salt: exfoliate and regenerate
Epsom salt is an incredibly popular ingredient in bath salts, bath bombs, and foot soaks. It’s essentially magnesium sulfate, rich in magnesium ions. It helps to minimize painful muscles, aching feet, and inflammation.
What’s more, it’s a natural exfoliant so it helps to remove dead skin cells, promotes healthy skin, and minimizes dry skin. There are many more benefits of Epsom salt but these are the most important for us here.
White kaolin clay: gentle exfoliator
This type of clay is incredibly gentle and soft and can be used by sensitive skin as well. While it helps to remove dead skin cells and detoxify the skin, it doesn’t dry it out (as some of its cousins like to do, such as bentonite clay).
Also, kaolin clay promotes skin regeneration, reduces oily skin, and helps to stimulate and tone the skin. It’s a skin-friendly ingredient and you can use it to make facial masks, facial cleansers, and scrubs.
*Emulsifying wax NF (optional): to wash off all greasy residue
This is an emulsifier, which means that it helps to bind water with oil in lotion and cream formulations. But that’s not its only job: it works great in certain oil-based products, for example, a scrub or a cleansing balm/oil.
Because of this wax, the product emulsifies when it comes into contact with water. When it emulsifies, it washes off your skin easily without leaving any greasy residue of the oils and butters behind.
This wax is an excellent alternative to use in said recipes for all who dislike the leftover oil residue on their skin after they used an oil-based cleanser. It’s an optional ingredient if you want to experiment but I recommend you to give it a try; your cleansing balm without this wax will never be the same!
You can then use this wax to make creams and lotions, cleansing balms and oils, emulsified scrubs, face masks, and much more!
Tips on substitutions and ingredients
The ingredients list may seem long, but you’ll make 8 different recipes, and you’ll still have some of them left to make more recipes either from this series or experiment on your own.
You don’t need to get all the ingredients from the list and I’m sure you already have some at home, especially those waiting in your pantry.
But there are some ingredients that you can use in the future as well since you’ll need them in smaller amounts. These normally come with a long shelf-life so that means they may last up to two years in a dark and dry spot.
The three I’m talking about are
- Candelilla wax (you can substitute it for beeswax if that’s your wax of choice, but you’ll have to adjust the recipes since the general ratio of candelilla to beeswax is ½ to 1. That means if a recipe calls for 10g beeswax, you’ll use 5g candelilla wax. You can use candelilla in lip balms, lotion bars, healing salves)
- Cetyl alcohol (I don’t recommend omitting this ingredient from the recipes as it both improves the slip and acts as a non-greasy counterweight to otherwise greasy oils. It’s a very versatile ingredient and works in all sorts of recipes, from lotions and creams to body scrubs, facial balms, cleansers.)
- Vitamin E oil (a little bit of E oil goes a long way so one small bottle will last a long time. This oil is used to prolong the shelf-life of the oils and prevent them from going rancid. It’s a useful ingredient that can be added to all oil-based products)
Now, let’s say a few words about essential oils!
The combo I used smells amazingly divine. But if you’re trying not to splurge, you don’t have to buy all three. Doing so produces great winter wonderland results, but you can easily swap wild orange for tangerine, blood orange, grapefruit or sweet orange if that’s something you already have at home. You also don’t need both clove and cinnamon; if you have one of these at home, use that. You can also completely omit these essential oils I listed and choose something that suits your nose best!
Additional tips to consider
- About the salts: I use both Epsom and sea salt in the recipes. But you don’t have to buy Epsom salt just for this series (unless you plan on using it for other things as well). Feel free to substitute it with sea salt or even Himalayan pink salt. You can omit Epsom salt from shower melts altogether and use sugar in place of salt in the whipped sugar scrub. Just use whatever’s in your kitchen!
- White kaolin clay: I use 1g of kaolin clay in one of the recipes. You don’t have to buy it just for this! Use whatever clay you have at home and works for you best. No clay? No problem! Use another exfoliator that’s gentle enough for the facial skin (baking soda?) or omit it altogether. The cleansing balm will be just as cleansing and creamy, although less scrubby.
- About the containers: you don’t have to buy all new containers to store the products in. Instead, you can easily recycle mason jars you already have at home and use them for shower melts, body butter bars, and even body scrubs. Just clean them thoroughly (hot soapy water will do), dry them and reuse them!
Other equipment you’ll need
Here are a few things that are a must in any DIY repertoire:
- A scale (ideally one that goes all the way to 0.01g; I’ve used this one for a few years and it works great!)
- A silicone spatula (makes whisking and stirring so much easier since it’s flexible)
- A heat-resistant measuring beaker/cup (you’ll need at least two of these if you’re planning on making lotions and creams at home)
- Hand mixer
- Containers for storage
And that’s it! Now I believe you’re ready to get whipping! I hope you enjoy the recipes as much as I do! Happy crafting!
Have you made any of the recipes? Tag us on Instagram #wildfordiy!
Have questions or comments? Feel free to leave them below!
Stay Wild,
— Kat